 Ultimate guide
RV Pre Purchase Inspection Checklist 2026: The Complete Guide
Last Updated: October 25, 2026
Quick Summary
An RV pre purchase inspection should check the roof and sealant lines, water intrusion with a moisture meter, electrical and plumbing systems, propane safety, tires and chassis, and slide-outs and appliances. Confirm shore power and water are available, plan at least two hours, and photograph every issue so findings become documented negotiating points.
- Photograph the VIN plate and confirm it matches the title and listing.
- Schedule the walkthrough for dry weather so water intrusion is not masked.
- A moisture meter is the tool most buyers skip and the one that pays for itself fastest.
- Tires age out before they wear out, so check the DOT date code on every tire.
- Book a professional inspection before signing so the findings still have use.
Table of Contents
- Why an RV Pre Purchase Inspection Checklist Matters in 2026
- What to Bring and How to Prepare Before You Inspect
- Exterior Inspection: Roof, Walls, and Sealant Integrity
- RV Water Damage Inspection: Finding Delamination and Water Intrusion
- Interior Inspection: Floors, Ceilings, and Cabinetry
- Electrical System: Battery Bank, Converter, and Shore Power
- Plumbing System: Water Pump, Holding Tanks, and Water Heater Bypass
- Propane System Safety: LP Leak Test and CO Detector Checks
- Tires, Chassis, and Suspension: Age, Tread Depth, and Frame Rust
- Slide-Out Alignment, Awning Operation, and Appliance Functionality
- How to Use a Used RV Inspection Checklist Without Missing Anything
- When to Book a Professional RV Inspection
- Reading Your RV Inspection Report and Negotiating Repairs
- Digital Diagnostic Tools and 2026 Model Year Considerations
- Book Your Pre-Purchase Inspection Before You Sign
- Frequently Asked Questions
Why an RV Pre Purchase Inspection Checklist Matters in 2026
A used RV can look immaculate in photos and still hide thousands of dollars in water damage, tired tires, or a failing converter.
The stakes go beyond the purchase price. An RV is a house, a vehicle, and a utility system rolled into one, and each of those systems ages on its own schedule.
Below, we break down every system worth checking, the tools that make the job faster, and how to turn your findings into negotiation use. We also flag the parts most buyers rush, because that is usually where the expensive surprises live.
What to Bring and How to Prepare Before You Inspect
The right kit and a little preparation turn a two-hour walkthrough into a productive one.
Preparation matters as much as gear. Confirm the RV will be plugged into shore power and hooked to a water supply so you can test the converter, outlets, water pump, and water heater under real conditions.
A practical pre-inspection sequence we recommend:
- Photograph the VIN plate and confirm it matches the title and listing
- Ask for maintenance records and note the last roof and sealant service
- Confirm shore power and water will be available on inspection day
- Bring a printed or digital checklist so nothing gets skipped
- Plan at least two hours, more for a large unit or one with slide-outs
Watch out: Inspecting in the rain or right after a wash can mask active water intrusion and make sealant look fresher than it is. Schedule the walkthrough for dry weather when possible.
Exterior Inspection: Roof, Walls, and Sealant Integrity
Start at the roof and work down, because the roof is where water gets in and the walls are where the damage shows up.
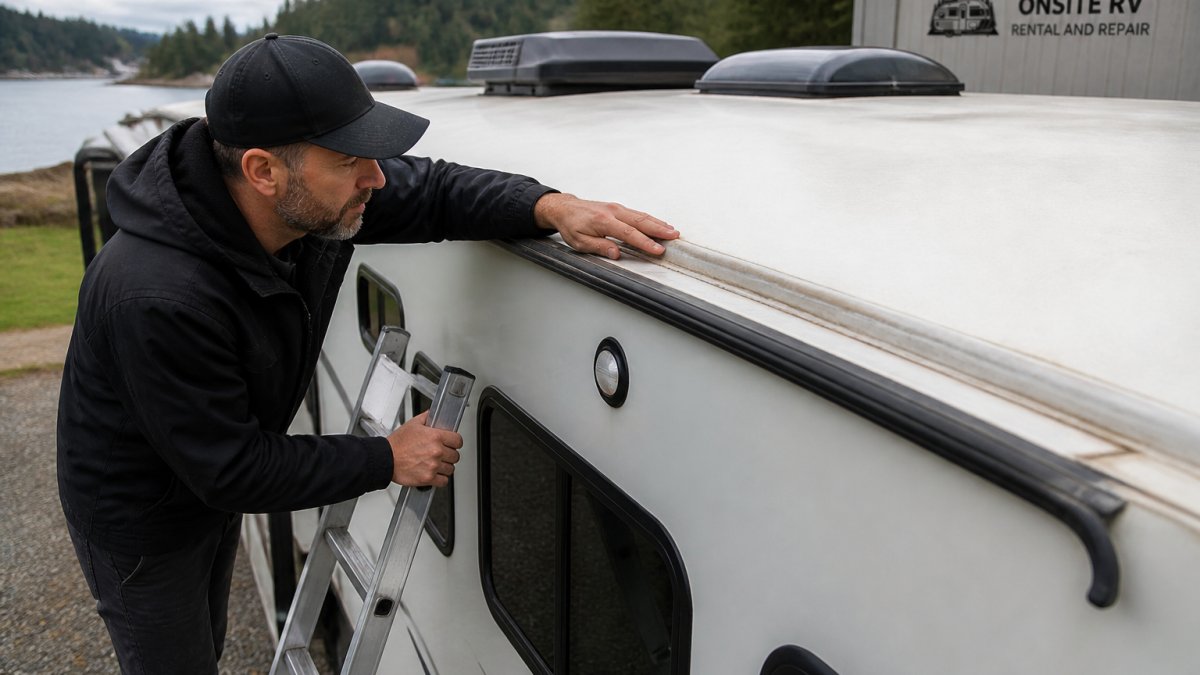
Walk the sidewalls and look for ripples, bubbling, or wavy sections, which can signal delamination.
RV Water Damage Inspection: Finding Delamination and Water Intrusion
Water damage is the most expensive problem in any used RV, and it rarely announces itself. An RV water damage inspection means looking for the quiet signs: soft spots in the floor, staining on ceiling panels, a musty smell, and wavy exterior sidewalls that indicate delamination. Any one of those signals warrants a closer look before you commit.
Using a Moisture Meter and Checking for Soft Spots
A moisture meter is the tool most buyers skip and the one that pays for itself fastest. Run it along interior walls near windows, around the roof line, under slide-outs, and around every penetration point. Readings that spike in one area but not another tell you where water is getting in. Combine that with a hands-and-knees check for soft spots in the floor, especially near the entry, bathroom, and kitchen.
Watch out: Fresh paint or new interior paneling can hide old water stains. If a seller has recently renovated a section, ask why and probe that area first.
Interior Inspection: Floors, Ceilings, and Cabinetry
Inside the unit, the goal is to find evidence of what the exterior is hiding. Check ceilings for staining and sagging, floors for soft spots and uneven seams, and cabinetry for swelling, separation, or a fresh paint smell that might mask mold.
Test the things you will actually use every day. Open and close every window and vent. Check that doors latch and that the walkthrough feels solid underfoot. A unit that feels loose or rattly inside usually has a story underneath it, whether that is a tired chassis, worn suspension, or a slide-out that needs adjustment.
Electrical System: Battery Bank, Converter, and Shore Power
The electrical system is where a lot of used RVs quietly fail, and it is one of the easiest systems to test if the unit is plugged in.
Pay particular attention to the inverter if the unit has one, and confirm the solar setup, if present, is actually charging. A common mistake is testing the electrical system on battery power alone and missing a dead converter. For a deeper walkthrough, see this step-by-step guide to troubleshooting RV electrical system issues.
Plumbing System: Water Pump, Holding Tanks, and Water Heater Bypass
Run the water. With the unit hooked to a supply, check every faucet, the shower, and the toilet for pressure and leaks, then switch to the water pump and confirm it holds pressure without cycling constantly. Inspect the holding tanks, including grey water and black water tanks, for cracks and proper valve operation.
Look under every sink and around the water pump for staining or corrosion, which points to a slow leak. If the unit has been winterized, ask how and confirm the bypass valves are set correctly.
Propane System Safety: LP Leak Test and CO Detector Checks
Propane is the one system where a mistake is not just expensive, it is dangerous. An LP leak test should be part of every inspection, and the CO detector and fire extinguisher should be present, in date, and functional.
Never test for leaks with a flame. If you are not confident in the procedure, have a qualified technician run the LP leak test before you take possession. For deeper help, see how to troubleshoot RV propane system issues safely. This is not a section to rush.
Tires, Chassis, and Suspension: Age, Tread Depth, and Frame Rust
Tires age out before they wear out, and that catches a lot of buyers. Check the DOT date code on every tire, measure tire tread depth, and look for cracking or bulging sidewalls. A tire with plenty of tread but an old date code is still a risk.
Wheel bearings and suspension components are worth having checked by a technician if anything feels off during the road test. Ask about the maintenance records for bearing service and brake work. A chassis that has been looked after is a much better foundation than a shiny body on a neglected frame.
Slide-Out Alignment, Awning Operation, and Appliance Functionality
Run every slide-out through a full cycle and watch for binding, uneven travel, or gaps in the slide-out seals. Operate the awning fully out and back. Then test every appliance: the fridge on both power sources, the furnace, the air conditioner, and the HVAC performance overall.
The walkthrough and road test tie this section together. During the road test, listen for rattles and check that the unit tracks straight. After the drive, re-check the slide-outs and seals. Things that shift under load tell you something the parked inspection cannot.
How to Use a Used RV Inspection Checklist Without Missing Anything
A used RV inspection checklist only works if you actually follow it in order and record what you find. Print it or load it on your phone, work top to bottom, and photograph every issue with a note about location. The photo record is what turns your findings into negotiation use later.
A simple scoring approach keeps you objective:
| System | What to Check | Red Flag |
|---|---|---|
| Roof and seals | Membrane, sealant lines, vents | Cracks, lifted edges, bubbling |
| Water intrusion | Moisture meter, soft spots, staining | Rising readings, wavy sidewalls |
| Electrical | Converter, outlets, battery bank | Dead converter, tripping GFCI |
| Plumbing | Pump, tanks, water heater | Leaks, constant pump cycling |
| Propane | LP leak test, CO detector | Leak smell, missing detector |
| Tires and chassis | DOT date code, tread, frame rust | Old tires, frame rust |
| Slide-outs and appliances | Full cycles, fridge, furnace, AC | Binding, uneven travel |
A checklist is not a one-time document. See this complete RV systems maintenance guide to understand how inspection findings tie into ongoing upkeep. It is the start of the maintenance plan.
When to Book a Professional RV Inspection
Book a professional RV inspection whenever the unit is expensive, complex, or you are not confident in your own ability to test every system. A professional brings a moisture meter, a load tester, and the experience to spot problems a buyer would miss. For a unit with slide-outs, a solar setup, or any sign of water damage, the professional inspection is money well spent.
A common mistake is booking the inspection after signing. Book it before, so the findings still have use.
Reading Your RV Inspection Report and Negotiating Repairs
An inspection report is not a verdict; it is a negotiating document. The buyers who do best are the ones who translate findings into a clear, documented ask before the money changes hands. That means sorting findings by severity, attaching a defensible cost range to each one, and presenting a counteroffer the seller can actually evaluate.
Sort findings into three tiers
- Tier 1, Safety and structural. Failed LP leak test, missing or expired CO detector, cracked frame, delamination with active moisture, brake or tire failure. These are non-negotiable. If the seller will not remedy a Tier 1 item, walk away; the risk is not worth the discount.
- Tier 2, Functional. A converter that does not charge, a fridge that will not cool on propane, a slide-out that binds, a water pump that cycles constantly. These are negotiable and usually have a known repair range.
- Tier 3, Cosmetic and wear. Worn upholstery, faded decals, small scratches. These are expected on a used unit and rarely justify a price change on their own.
Turn findings into a number
A counteroffer built on a single lump sum invites haggling. A counteroffer built line by line is harder to argue with. For each Tier 1 and Tier 2 finding, write down:
- What the inspection found, with the photo or reading that proves it.
- What the likely repair involves (part, labor, and whether it is a dealer-only item).
- A realistic cost range, not a single number. Use ranges you can defend from local service quotes or published parts pricing.
- Whether you want the seller to repair it before closing or reduce the price so you can handle it yourself.
Structure the counteroffer
Present the report, the photo evidence, and a short summary table of Tier 1 and Tier 2 items with your cost ranges. Then offer two paths: the seller completes the Tier 1 repairs before closing and you accept the unit as-is on Tier 2, or the seller reduces the price by the combined Tier 1 and Tier 2 ranges and you take the unit as-is. Sellers respond better to a choice than to a demand.
Get any agreement in writing before you sign. Specify who performs the repair, what parts are used, and what documentation you will receive at closing. A verbal promise to "fix the fridge" is not enforceable; a written addendum with a completion date is.
Know when to walk
A seller who will not budge on a documented Tier 1 safety issue is telling you something about how the unit was maintained. The best deals are the ones where the inspection gave you the information to make a clear decision, including the decision to walk away. Budget for a pre-purchase inspection as part of the purchase cost, not as an optional extra, and treat the report as the foundation of the negotiation rather than a formality.
Digital Diagnostic Tools and 2026 Model Year Considerations
Most pre-purchase guides still assume a flashlight and a clipboard. That is no longer enough for a 2026 model year unit, where lithium-ion battery banks, smart-RV connectivity, and app-controlled systems are common. The right digital tools turn guesswork into documented readings you can show a seller, and they change the order in which you test certain systems.
Tools that pay for themselves on inspection day
- Pin-type and pinless moisture meters. A pinless meter lets you scan large wall and ceiling areas quickly without leaving holes; a pin-type meter confirms the exact depth and severity of a reading. Use the pinless meter first to map the unit, then the pin-type meter to verify any spike. Most practitioners find that readings taken near windows, roof penetrations, and slide-out openings are the ones that matter most.
- Infrared thermometer or thermal camera. A thermal camera shows temperature differentials that reveal hidden moisture, poor insulation, and overheating electrical connections. Scan the ceiling, the perimeter of slide-outs, and the breaker panel after the unit has been under load for 15 to 20 minutes. A hot breaker or a cold patch on a wall is a conversation starter.
- Bluetooth battery monitor and digital load tester. A clamp-style load tester gives you a pass/fail on the battery bank in minutes. A Bluetooth monitor lets you watch voltage sag under load and confirm whether the converter is actually charging. On a lithium-ion bank, confirm the battery management system is communicating and that the charger profile is set for lithium, not lead-acid.
- OBDII scanner for motorized units. On a Class B or Class C motorhome, an OBDII scanner pulls stored and pending codes from the chassis engine and can reveal issues a test drive will not. Clear codes are not proof of health; pending codes and readiness monitors that will not set are worth asking about.
- Digital manometer or LP leak detector. A digital manometer gives you a precise pressure-drop reading during an LP leak test, which is far more defensible than a soap-bubble check alone.
- Outlet tester with GFCI trip. A simple plug-in tester confirms wiring polarity, ground, and GFCI operation at every outlet in seconds.
What changes on a 2026 model year unit
A 2026 unit is not just newer; it is wired differently. Three areas deserve a modified sequence:
- Lithium-ion integration. Confirm the battery bank, inverter, and charger are all rated for lithium and that the low-temperature charge cutoff is enabled. Ask for the battery management system app or display and verify the state of charge and any fault history. A lithium bank that has been deeply discharged or charged below freezing can be degraded even if it looks new.
- Smart-RV connectivity. Many 2026 units ship with app-controlled lighting, climate, and tank monitoring. Test the pairing process, confirm the control module is present, and check that firmware updates are available. A smart system that will not connect is a functional issue, not a cosmetic one.
- Solar and inverter configurations. Confirm the solar charge controller is rated for the panel array, check the inverter's continuous and surge ratings against the appliances you plan to run, and verify the transfer switch operates cleanly when you move from shore power to inverter power.
A practical digital inspection sequence
- Plug in to shore power and let the converter charge for 15 minutes.
- Scan the interior with the pinless moisture meter and mark any spikes.
- Verify each spike with the pin-type meter and photograph the reading.
- Run the thermal camera over the ceiling, slide-out perimeters, and breaker panel.
- Load-test the battery bank and confirm the charger profile matches the battery chemistry.
- On motorized units, pull OBDII codes and note any pending or readiness issues.
- Test every outlet with the outlet tester, including GFCI trip and reset.
- Run a digital manometer LP leak test at the regulator and at each appliance connection.
This is the angle most generic guides miss. The tools and the model year both change the checklist, and buyers who account for that catch problems others miss. If the unit has modern electronics, ask for the documentation and confirm the systems are configured correctly, not just present.
Book Your Pre-Purchase Inspection Before You Sign
The best time to find a problem is before you own it. Book a mobile RV inspection with a step-by-step guide to what to expect and how to prepare. We travel to the unit, run the systems, and give you a report you can negotiate with.
Buying a used RV is a big decision, and the difference between a good buy and an expensive lesson is usually the inspection. ONSITE RV RENTAL AND REPAIR provides year-round RV repair and inspection services across Vancouver Island, with mobile service that comes to your site and a service shop in Port Alberni.
Frequently Asked Questions
What should be included in an RV pre purchase inspection checklist?
A complete RV pre purchase inspection checklist covers the exterior (roof membrane, sealant integrity, delamination, frame rust), interior (soft spots, ceilings, cabinetry), electrical (battery bank, converter, shore power, GFCI outlets), plumbing (water pump, holding tanks, grey water and black water systems), propane safety (LP leak test, CO detector), tires (DOT date code, tread depth, wheel bearings), slide-out seals, and appliance functionality including fridge, furnace, and AC. It should also confirm VIN verification, title history, and maintenance records.
Can an RV water damage inspection detect hidden leaks?
Yes, when it is done properly. An RV water damage inspection uses a moisture meter along interior walls, ceilings, and around slide-out seals and roof penetrations to find elevated readings that are not visible to the eye. Delamination, bubbling wall panels, and soft spots in the floor are further signs of water intrusion. Catch these early and you avoid rot in the chassis and framing that costs far more to fix than a reseal.
How long does a professional RV inspection take?
A thorough professional RV inspection typically takes two to four hours depending on the size of the unit and how many systems need testing. A full inspection includes a walkthrough, roof and undercarriage check, LP leak test, electrical load test, plumbing pressure check, appliance run-through, and a road test where possible. Book it before you sign and give yourself time to review the RV inspection report before negotiating.
What should I do if an RV inspection report finds problems?
Use the RV inspection report as negotiation leverage. Get written quotes for the repairs from a qualified technician, then either ask the seller to fix the issues before closing or reduce the price to cover the work. Safety items like propane leaks, faulty wiring, or a failed CO detector are non-negotiable. If the report shows major water intrusion or frame rust, walk away, because those repairs often exceed the value of the unit.
Should I hire a professional RV inspection or do it myself?
Do both. A used RV inspection checklist lets you screen a unit before you spend money on a pro. Once you are serious about buying, book a professional RV inspection. A certified technician has the moisture meter, LP leak detector, and diagnostic tools to catch problems a visual check misses, and the written report gives you documented evidence for price negotiation.
What are the most common problems found during an RV inspection?
The most frequent findings are water intrusion around roof seams and slide-out seals, delamination on sidewalls, worn tires past their DOT date code, weak or dead house batteries, propane leaks at fittings, and appliances that cool or heat poorly. Frame rust, soft floors, and failed GFCI outlets also show up regularly on older units. Most of these are fixable, but knowing about them before you buy changes what you should pay.