 How-to
RV Water Heater Repair: A Step-by-Step Guide
Last Updated: November 5, 2026
Quick Summary
Most rv water heater repair starts by identifying the symptom: lukewarm water or no hot water. Check power, fuel, breakers, fuses, the reset button and the thermostat first, since many faults come from these rather than the heater itself. Always turn off power and fuel and let the unit cool before opening it.
- Lukewarm water often means a weak burner flame, failing element, or sediment buildup.
- No hot water at all points to ignition failure, a tripped reset switch, or no power.
- Wait at least 15 minutes for the unit to cool before pressing the reset button once.
- Replacing the anode rod takes about 45 minutes with basic hand tools.
- Stop and call a technician if you smell gas or the high-limit switch trips twice in one day.
Table of Contents
- Diagnosing Common RV Water Heater Symptoms
- RV Water Heater Troubleshooting Before You Open Anything
- Testing 12-Volt DC and 120-Volt AC Circuits
- How to Use the RV Water Heater Reset Button Safely
- Inspecting Thermostats, High-Limit Switches and Control Boards
- RV Water Heater Anode Rod Replacement Step by Step
- Winterization and Post-Storage Startup for Your Water Heater
- When to Stop DIY and Book a Professional Repair on Vancouver Island
- Frequently Asked Questions
Diagnosing Common RV Water Heater Symptoms
Most rv water heater repair jobs start with one of two symptoms: lukewarm water or no hot water at all. Knowing which one you have narrows the list of causes fast. Owners often notice the problem the morning after a cold night, when the first shower feels off.
A useful first step is to check whether the water heater is getting power and fuel, and whether the thermostat is set above the minimum. Many owners find the fix is simpler than they expected, but some faults still need a technician.
Lukewarm Water Versus No Hot Water
Lukewarm water usually means the heater is running but not heating enough. Common causes include a weak burner flame, a failing heating element, or heavy sediment buildup at the bottom of the tank.
No hot water at all points to a more basic failure. The heater may not be igniting, the reset switch may have tripped, or the power supply may be cut off. Start with the simplest checks before you assume a major part has failed.
- Lukewarm: Check the burner flame, the tank for sediment, and the thermostat setting
- No hot water: Check propane, breakers, fuses, and the reset button
- Hot water that runs out fast: Suspect sediment or a partly blocked tank
Model-Specific Diagnostic Decision Tree
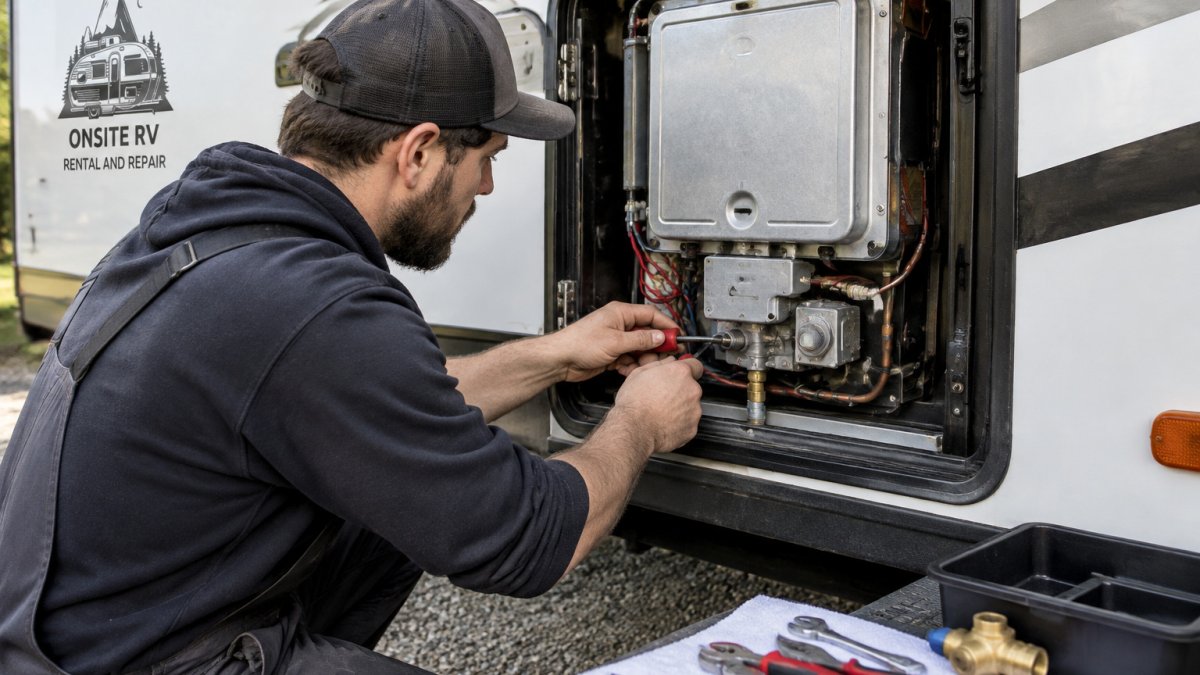
Water heater models differ in their controls. Many RVs use a gas and electric combination unit, while some use only one fuel source. Check your owner's manual or the data plate on the unit to confirm which type you have.
Use this simple path to narrow the cause:
- Does the unit get 120-volt AC power when you run it on shore power? If not, check the breaker and fuse first.
- Does the gas burner light? If not, check the propane supply and the ignition system.
- Does the heater run but stay cool? Check the thermostat and the high-limit switch.
- Does the heater run and heat, but the water is still weak? Suspect sediment or a worn heating element.
Working through the list in order usually saves time and avoids replacing parts that still work.
The article sums up the most common symptoms and their likely causes, which you can check in this order:
| Symptom | Likely cause | First check |
|---|---|---|
| Lukewarm water | Weak burner flame, failing element, or sediment | Burner flame, tank sediment, thermostat setting |
| No hot water at all | Ignition failure, tripped reset switch, or no power | Propane, breakers, fuses, reset button |
| Hot water runs out fast | Sediment buildup or partly blocked tank | Sediment in the tank |
RV Water Heater Troubleshooting Before You Open Anything
Before you open the access panel, run through a few safe checks. Many RV water heater faults come from power or fuel, not the heater itself. Taking these steps first protects you and your rig.
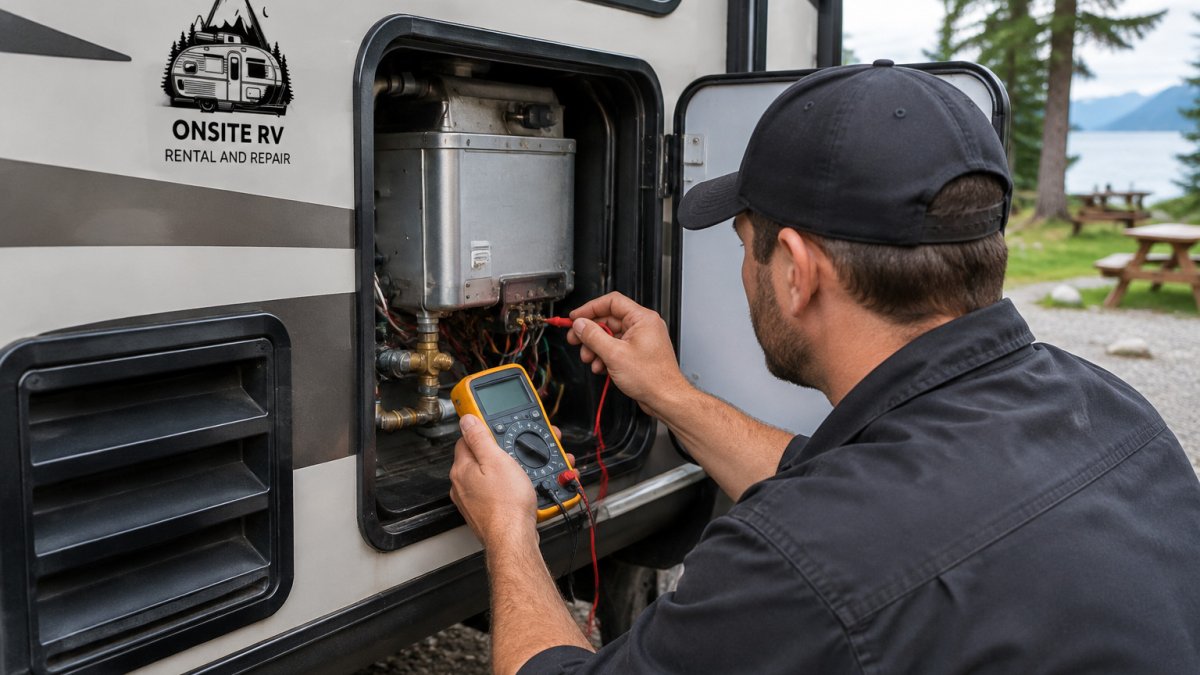
Always turn off the water heater and let it cool before you touch the burner or wiring. Work in a well-ventilated space, and keep open flames and sparks away from the propane system.
Checking Electrical Power, Breakers and Fuses
Start by confirming that the RV has power. Look at the shore power connection, the inverter, or the generator, depending on how you are running the coach. A dead panel means the heater will not run on electricity.
Next, check the breaker for the water heater circuit. A tripped breaker often explains a unit that will not start on electric. Reset it once. If it trips again right away, stop and call a technician, because you may have a short.
Some RVs also use a fuse on the 12-volt DC side that controls the ignition or the control board. Check the fuse panel and look for a blown fuse with a visible break in the metal strip.
- Confirm shore power or generator output
- Reset the water heater breaker once, then stop if it trips again
- Inspect 12-volt fuses for a broken element
Checking Propane Supply and Ignition
Gas-fired heaters will not light without propane. Check that the tank valve is open and that the tank has fuel. Many owners forget the valve after a trip or a refill.
Watch the ignition sequence when you switch the heater to gas. You should hear a click, see a spark, or see the burner light. If you smell gas, shut off the tank valve and leave the area. Do not try to light the unit.
A common mistake is assuming the burner is faulty when the real issue is low propane pressure or a closed regulator valve. Check the supply side before you touch the burner.
Testing 12-Volt DC and 120-Volt AC Circuits
Water heaters use two electrical systems: 120-volt AC for the heating element and 12-volt DC for the controls and ignition. Each one can fail for different reasons, so test them separately.
A multimeter is the right tool for this job. Set it to the correct range before you touch any terminals, and make sure your hands are dry.
For 120-volt AC, a healthy circuit should show close to 120 volts at the heater terminals when power is on. For 12-volt DC, expect a reading near 12 to 13.5 volts at the control board when the battery is charged. Readings far below these values point to wiring, a weak battery, or a bad connection.
Test resistance on the heating element with the power off. A working element reads a steady, low resistance. An open reading means the element has failed and needs replacement.
Always disconnect power before you test resistance or pull connectors. Mistakes here can damage the control board or cause a shock.
How to Use the RV Water Heater Reset Button Safely
Many RV water heaters have a reset button for the high-limit or overheat switch. If the unit shuts down and will not restart, this switch may have tripped to protect the tank.
Before you press reset, wait at least 15 minutes for the unit to cool. Then find the reset button, usually on the front or side of the heater, and press it firmly once.
Watch the heater after the reset. If it starts and runs normally, the trip may have been a one-time event. If it trips again within a short time, do not keep resetting it. Repeated trips point to a faulty thermostat, a bad high-limit switch, or a sediment problem that makes the tank overheat.
Watch out: Pressing reset over and over can hide a dangerous overheat problem. If the button trips twice in one day, stop and book a service check.
Inspecting Thermostats, High-Limit Switches and Control Boards
The thermostat tells the heater when to run and when to stop. A thermostat set too low or a faulty sensor can make the heater seem dead when it is working correctly.
Check that the thermostat is set above the current tank temperature and that the setting is responding. If the dial feels loose or does nothing when you turn it, the thermostat may need replacement.
The high-limit switch protects the tank from overheating. It is the part behind the reset button. A tripped or failed high-limit switch will keep the heater off even when the thermostat calls for heat.
Control boards manage ignition and safety timing on many newer units. Look for error codes or blinking lights on the board, and check your manual for what they mean. Board faults usually need a professional, since they often involve sealed electronics.
- Thermostat: confirm the setting and check for a loose or dead dial
- High-limit switch: check for a tripped reset button
- Control board: note any error codes or flashing lights before you call for help
RV Water Heater Anode Rod Replacement Step by Step
The anode rod is a sacrificial metal rod inside the tank. It corrodes so the tank does not. A worn-out anode rod can shorten the life of the water heater, so replacing it on schedule is one of the most useful maintenance steps you can take.
Total Time: About 45 minutes Difficulty: Moderate, with basic hand tools
What You'll Need:
- A socket wrench or the correct size socket for the anode rod
- A replacement anode rod that matches your tank
- A bucket and rags to catch water
- Pipe thread sealant or Teflon tape
Step 1: Drain and Isolate the Heater Turn off power and fuel, then shut off the water supply. Open a hot tap in the coach to relieve pressure. Attach a hose to the drain valve and drain the tank into a bucket.
Step 2: Remove the Old Anode Rod Fit the socket on the anode rod and turn it counterclockwise. It may be tight after years in place. Once it loosens, unscrew it fully and set the old rod aside.
Step 3: Install the New Anode Rod Wrap the threads with sealant or tape. Thread the new rod in by hand first, then tighten it snugly with the socket. Do not overtighten.
Step 4: Refill and Check for Leaks Close the drain valve, reopen the water supply, and run a hot tap until air clears. Turn the heater back on and watch the anode rod area for drips for at least 15 minutes.
Expected Result: The rod is snug, the area stays dry, and hot water flows normally.
Winterization and Post-Storage Startup for Your Water Heater
Freezing weather can crack a water heater tank or damage fittings. On Vancouver Island, mild winters still bring cold snaps that matter for a stored RV. Protect the heater before the cold arrives, and check it carefully before you use it again.
Drain the tank completely before freezing temperatures set in. Open the drain valve and the pressure relief valve to let all the water out. Bypass the heater in the plumbing if your model allows it, so antifreeze can go through the lines without entering the tank.
When spring comes, do the reverse. Close the drain, refill the tank, and check every fitting for leaks. Run the hot tap until air clears, then turn the heater on. Watch for odd noises, weak flame, or error codes during the first run.
Freeze damage often shows up as a small crack or a slow drip. Look for water under the unit after the first few hours of use.
When to Stop DIY and Book a Professional Repair on Vancouver Island
Most owner checks in this guide are safe with the power and fuel off. The boundary is not about difficulty; it is about what can hurt you or damage sealed components. Use the lines below to decide whether to keep going or hand the job to a technician.
Owner-safe checks
- Confirming shore power, generator output, and breaker status
- Inspecting 12-volt fuses for a visible break
- Checking that the propane tank valve is open and the tank has fuel
- Pressing the reset button once after the unit cools
- Testing the heating element for resistance with the power off
- Draining and flushing the tank, and replacing the anode rod
Stop and call a technician
- You smell gas, or you see soot or scorch marks at the burner or flue
- The breaker trips again immediately after one reset
- The high-limit switch trips twice in one day
- The tank is cracked or leaking from the shell rather than a fitting
- The control board shows error codes you cannot clear against the manual
- The burner needs cleaning, adjustment, or replacement
- Any work inside the 120-volt AC junction box or on sealed electronics
Repair or replace: how to decide
A common pattern is to compare the cost of the failed part against the age of the unit and the condition of the tank. A heating element, thermostat, high-limit switch, or anode rod is usually worth replacing on a tank that is otherwise sound. A cracked tank, a badly corroded shell, or a failed control board on an older unit often tips the decision toward replacement, because the repair cost approaches the value of a new heater and the tank may fail next.
Set expectations before you start. Simple part swaps such as an anode rod or element are often an hour or less with basic hand tools. Burner service, board replacement, and gas-side work take longer and need test equipment and gas-handling experience, which is why they sit on the professional side of the line.
What to have ready when you call
Note the unit's make, model, and serial number from the data plate, the fuel type, whether it is tank or tankless, and any fault code or symptom pattern. That information lets a technician bring the likely parts and shortens the visit.
If you would rather not troubleshoot alone, book a mobile RV inspection and we will check the system for you. You can also troubleshoot RV propane system issues on your own first to narrow the problem. For a fuller maintenance plan, read how to maintain RV systems. If your problem looks like a furnace fault too, our RV furnace troubleshooting steps cover the shared propane and ignition checks. To reach our team directly, see our contact page or call 1.250.418.0073.
Frequently Asked Questions
Why is my RV water heater not producing hot water?
The most common causes are a tripped breaker or blown fuse on 120-volt AC, a propane supply problem, a tripped high-limit switch, or a worn anode rod causing sediment buildup that reduces heating. Start by confirming the water heater is switched to the correct energy source, then check breakers, fuses and propane valves before testing the thermostat and high-limit switch. Work through the checks in order, and stop if you smell gas or see scorching on the wiring.
How do I reset an RV water heater?
Most RV water heaters have a high-limit reset button, usually a small red or black button on the burner compartment or the control panel. Turn off power and propane, wait several minutes for the unit to cool, then press the reset button firmly. Restore power and propane and watch for ignition. If the button trips again within a short time, the underlying cause such as an overheating thermostat, a blocked vent or a faulty switch needs to be found before the unit runs again.
Can I repair an RV water heater myself?
Simple fixes such as checking breakers, fuses, propane supply, the reset button and the anode rod are reasonable for a careful owner. Replacing gas valves, control boards, burners or anything involving gas leaks should be left to a qualified technician. If you are unsure about a test or a reading, stop and book a service appointment. ONSITE RV RENTAL AND REPAIR offers mobile service and can be reached through the website to book an appointment.
How often should I maintain my RV water heater?
Flush the tank, inspect the anode rod and check the burner and vent at least once a year, and more often if you camp in areas with hard water or use the unit heavily. Check the anode rod after the first season and replace it when it is heavily corroded. Before winter storage, drain the tank completely and follow winterization steps so the unit is ready for spring startup.